Wednesday 22 February 2017

Frankie Storey - 0157 - Final Production and Evaluation


                                                                 Music Video


                                                                 4 Panel Digipak


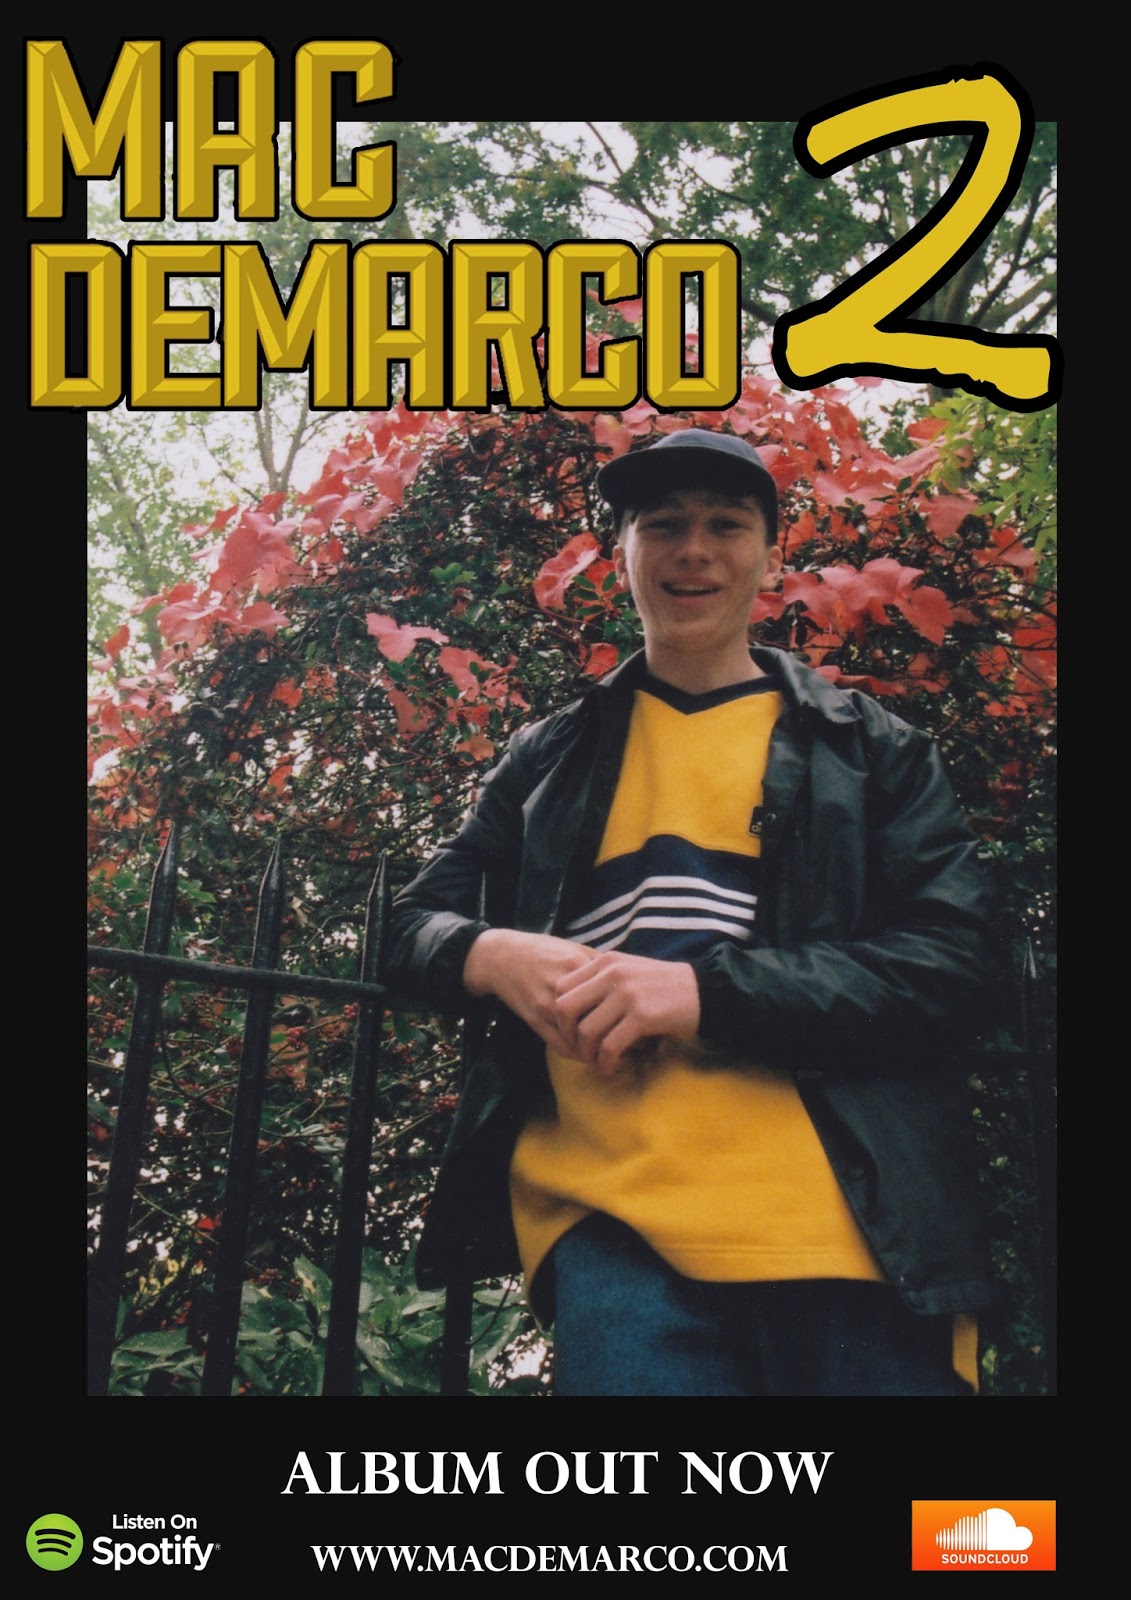
                                                        Full Page Advertisement


Evaluation Question 1

In the book ‘dancing in the distraction factory’ (1992) Goodwin identifies a variety of codes that can be applied to music videos to give them genre defining qualities and characteristics. He states that there is often a significant relationship between the visuals and the lyrics. ‘Freaking out the neighbourhood’ by our artist Mac Demarco is a song that fits into the indie rock genre. Our research shows that indie rock music videos are often illustrative in terms of the meanings presented by the lyrics and the visuals. This was evident in Kurt Vile’s  ‘pretty pimpin’, where the subliminal message of the piece is having problem with his identity, this is anchored through the visuals with there being multiple versions of him in the shots.  
After analysing the lyrics of our song, the theme of the song is from a nostalgic view point of getting ‘carried away’ behaving in a childish and humourous manner. We decided to put an ironic twist on this by filming in a very affluent part of London, hence ‘freaking out the neighbourhood’.
Goodwin also states that music videos contains conventions and codes depending on the genre that they fall into through secondary research, I concluded that many artists from the indie rock genre use their music videos as a way of conveying, developing and confirming their metanarrative. This generally involves features such as prevalence of the artist in the video as well as performance close ups and meat shots of the artist. These are conventions that we creatively applied to our video. We also used this to construct para social intimacy and give a present feel for the audience.
Our promotional campaign is also relatively conventional in the way that it is structured. Both products individually and the campaign as a whole. Several typical conventions of a music video can be identified within ours. For example, there is a short intro before the music begins, introducing the artis in an obvious way. It is conventional for this part of the video to include iconographyof the artist, another way feature that Goodwin discusses. in this case iconography is mainly to do with his costume. The bright yellow costume is seen as a signifier of his metanarrative and anchors his ‘retro’ look. The falling out the car shot is one replicated in the European vegas video previously researched.
Throughout the video, the form is conventional. There is a combination of performance and meat shots portrayed in a voyeuristic way. In our video there is only one character which breaks conventions with the indie rock genre. In terms of form, these meat shots are very effective in creating the image of the artist as authentic. 


Evaluation Question 2


Evaluation Question 3


Evaluation Question 4


We used blogger.com as a collaborative e-profile in our group throughout the planning, construction and evaluation. for example using different mediums in the form of a blog to tie all media together. We have used video, google slides and typed documents with images to create a cohesive profile, giving it more depth and developing our skills in presentation and layout within an internet basis. Both of us within the blog worked together and used technology where we could both edit one piece at the same time, for example google slides where we could both work on one presentation at the same time, to be more time efficient and meet the deadlines set. Images were also very important on the blog as the visuals are a crucial aid to text as on a blog, so inserting images in appropriate places was crucial for making our planning and construction clear and fluent, for example in our lesson logs where we had to insert images of our editing process along with tools and detailed descriptions of how we did it. 

Using SurveyMonkey.com to carry out audience research was very useful as we gathered important information about peoples opinions to do with our song and our artist, which enabled us to make creative decisions and use the audience research to justify our decisions whether we chose to do what the audience told us to do or make it slightly unconventional and go in the other direction creatively, this aspect of the planning really helped us with construction of our piece as the survey monkey enabled us to gather information in the form of pie charts and other forms of quantitative data which we could compare and contrast the answers of the closed questions to to make justified decisions. For example we asked a question if the audience knew who our artist was and if they didn’t then we could go against what they said in some of the other questions in order to make it suitable or our genre and our artists metanarrative

This is an example of web 2.0 because we used the internet with survey monkey to interconnect with our audience through a questionnaire, also sharing it on Facebook gave us access to a pluralistic media landscape where a variety of people could answer our survey, giving us a more accurate representation for our questions, which in turn enabled us to learn about the psychographics of our target audience.

To create our animatic we used DaVinci Resolve, we did this by drawing stills of the shots we wished to take and the movement that we wanted to use in the shots, this gave us a clear visualisation of what shots we needed to take in what frames. We simply cut the clips to the right size and used the razor tool to cut down the clip and cut it to the beat by using this process. Using this program let us get used to this program as we hadn't used it before, and also allowed us to plan our shoot thoroughly and in enough depth to film properly, after our location reccie we had a very good idea of the shots we were going to take using what movement and frame size. 

During the shoot we used a cannon 600d, on the 600d we could change the frame rate and make it , along with a glide cam, a chest mount and a track slider.  We had appropriate equipment to create smooth shots that we can put into slow motion and it would still be effective. This is because in slow motion any unsteady camera work would be accentuated. the use of the track slider gave us some camera movement which gives an extra dynamic to the frame. 
1)The shots using the slider were very effective, because we were able to get more dynamic shots throughout. In our research we found that in music videos movement of camera was crucial and in the pretty pimping video by Kurt Vile some of the tracking shots we wanted to emulate that had a slight pan whilst tracking which means instead of simply moving parallel to the focus of the shots we could move in more of a ‘U’ shape. These shots came out very nicely on the canon, we were pleased with these shots as they came out looking like authentic shots that would be useable in a professional production. 
2)The chest mount was a very easy way of taking shots on the move without having to balance the glide cam, these shots were very useful as on an HD camera any shaking of the camera makes it look unprofessional especially when in slow motion. we were very proud of these shots as we could take the same shot from numerous angles quickly without having to fiddle with the weight distribution of the glide cam, meaning we could exhibit pans along with a ghosting walking technique which again, added extra smoothness to the shots.  
3)changing the frame rate to 60fps at a slightly lower resolution picks up better on slow motion was very useful as it meant it would look more crisp in slow motion. This was very useful because as we were using an HD we were able to lose a small bit of resolution per frame, in order to have more frames taken. This was especially important for where the camera or the character where moving excessively, for example in the following shots, as both subjects were moving the extra frames, made the movement smoother. 

The challenges we had to overcome included pedestrians, as during our research into conventions, unless the public where a part of the shots they would not be included. For example, in ’The Noose of Jah City’ by King Krule, the environment they are in is in a public place however pedestrians are not seen, which we attempted to do in order to conform to the conventions of our genre and the form that our video was in. This did mean however, that we had to retake a number of shots, but our research into logistics during the recce meant that we knew that the area wouldn’t be busy during the morning on a week day. We also struggled with how to use the new equipment, as it was our first time using a track slider and glide cam. We overcame this by trying out each piece of equipment doing a range of shots before we went out to film throughout Notting Hill. We did find from using these pieces that the glide cam was difficult to use when needing to film more than the one off shot as the weights needed to be balanced properly.         
Another challenge that we faced was as we were using 35mm photos in our printwork, we had to scan them into the computer before editing, which we were apprehensive about as sometimes they scan grainy if the printing of the photos isn’t perfect. We did have to re-scan the photos to put them into our Photoshop file before editing.    

We did the editing for our music video on DaVinci Resolve  where we experimented with a number of new techniques. One of these techniques was time manipulation, we set our clips to 50% speed and then from there, depending on whether we felt they should be longer or shorter we adapted it from there.  The speed of each individual clip was important in the overall construction to make it fit the forms of a music video, with cutting to the beat. This is a common convention of a music video for the visuals to have a relationship with the sound.                                                                                    Another technique we used was to colour grade certain parts of our footage so they still had smooth transitions between each shot, we did this by darkening certain shots and increasing the contrast so that the yellow of the main characters jumper was always given prevalence, we attempted to do this very subtly so the main character was highlighted in each shot. We did this by colour selection. Selecting yellows in the shot but reducing the effect so it didn’t dull out the other colours too.                 
Using the scissor tool only we managed to created a smooth piece where narrative fuzz was apparent. using the scissor tool in a more complicated way to follow a montage style, with numerous lines of action was difficult as if it was too random in ordering it wouldn’t make sense, and also we had to position certain shots in line with certain words of the visuals.                                                    

We took an unconventional approach to our print work, using an Olympus OM-20 which takes 35mm film in order to create a shot that would not only have a vintage feel which follows the metanarrative of our chosen artist, Mac DeMarco, and the aesthetics on 35mm we feel would be perfect for the form that our print work was planned to follow . This technique does have disadvantages however, as we could not view the photos we had taken until we had developed them. So we took numerous pictures in order to have a range to choose from using different angles and frames. We chose to use the same location for our paintwork so there was a strong correlation between the two. In photoshop during the editing process of our pieces, we used the colour balance in order to highlight the yellow of the sweatshirt that our ‘artist’ is consistently wearing throughout. Selecting the yellow using the colour picker and applying that in colour balance highlighted the yellows. Without lessening the effect of the other colours. Typography was also very important across our pieces. As we could have a relationship between the two. Choosing a font proved difficult. However once choosing one, we had to use the colour range tool to remove this font from the poster that it was originally on. And then change the colour of it by selecting it and reducing the opacity. Before again changing the colour balance to the same as the one we had selected before and then duplicating this layer until it was opaque.                             

Also the positioning of the pictures and the text was very important to the overall look of the pieces. For example, on the advertisement, using layering and the moving tool to position the text, following the rule of thirds and other conventions of printwork we had found from research into existing printwork, such as hierarchy of text with the most important text in largest and the least, smallest, all using the scale tool. 


Research and Planning

Analysis of Video: Mount Kimbie - You Took Your Time (feat. King Krule)
Written Analysis: Wu Lyf - Dirt
Digipak Cover Analysis: Noah and the Whale
Synaesthesia pitch
Music Video Ideas
Digipak Initial Design: Good Morning
Analysis of Promo Package : King Krule - A lizard state (6 feet beneath the moon)
Preliminary planning
Moodboard of Indie Rock
Concept Development
Track Choice Treatment
Brighton Preliminary Short
Brighton Preliminary Production Log
Brighton Reccie: Print Ideas
Test Shots with Reccie
Technical Analysis: King Krule - Octopus
Audience Research: Concept development 
Pitch 
Audience Research: Questionairre Responses
Storyboarding with reflection on pitch
Rough cut feedback
Basic Printwork Ideas
Animatic
Lesson Log


Logistics

Location Reccie: Notting Hill

Post Production

Lesson Log: Progress update
Lesson Log Progress update 2
Lesson Log: Progress update 3
Lesson Log: Printwork update
Lesson Log: Further Printwork ideas
Lesson Log: Progress Update 4
Further Rough cut


Monday 30 January 2017

Frankie Storey- Evaluation


Evaluation Q4
We used blogger.com as a collaborative e-profile in our group throughout the planning, construction and evaluation. for example using different mediums in the form of a blog to tie all media together. We have used video, google slides and typed documents with images to create a cohesive profile, giving it more depth and developing our skills in presentation and layout within an internet basis. Both of us within the blog worked together and used technology where we could both edit one piece at the same time, for example google slides where we could both work on one presentation at the same time, to be more time efficient and meet the deadlines set. Images were also very important on the blog as the visuals are a crucial aid to text as on a blog, so inserting images in appropriate places was crucial for making our planning and construction clear and fluent, for example in our lesson logs where we had to insert images of our editing process along with tools and detailed descriptions of how we did it. 

Using SurveyMonkey.com to carry out audience research was very useful as we gathered important information about peoples opinions to do with our song and our artist, which enabled us to make creative decisions and use the audience research to justify our decisions whether we chose to do what the audience told us to do or make it slightly unconventional and go in the other direction creatively, this aspect of the planning really helped us with construction of our piece as the survey monkey enabled us to gather information in the form of pie charts and other forms of quantitative data which we could compare and contrast the answers of the closed questions to to make justified decisions. For example we asked a question if the audience knew who our artist was and if they didn’t then we could go against what they said in some of the other questions in order to make it suitable or our genre and our artists metanarrative. 

This is an example of web 2.0 because we used the internet with survey monkey to interconnect with our audience through a questionnaire, also sharing it on Facebook gave us access to a pluralistic media landscape where a variety of people could answer our survey, giving us a more accurate representation for our questions, which in turn enabled us to learn about the psychographics of our target audience.

To create our animatic we used DaVinci Resolve, we did this by drawing stills of the shots we wished to take and the movement that we wanted to use in the shots, this gave us a clear visualisation of what shots we needed to take in what frames. We simply cut the clips to the right size and used the razor tool to cut down the clip and cut it to the beat by using this process. Using this programme let us get used to this programme as we hadn't used it before, and also allowed us to plan our shoot thoroughly and in enough depth to film properly, after our location reccie we had a very good idea of the shots we were going to take using what movement and frame size. 

During the shoot we used a cannon 600d, on the 600d we could change the frame rate and make it , along with a glide cam, a chest mount and a track slider.  We had appropriate equipment to create smooth shots that we can put into slow motion and it would still be effective. This is because in slow motion any unsteady camera work would be accentuated. the use of the track slider gave us some camera movement which gives an extra dynamic to the frame. 
1)The shots using the slider were very effective, because we were able to get more dynamic shots throughout. In our research we found that in music videos movement of camera was crucial and in the pretty pimping video by Kurt Vile some of the tracking shots we wanted to emulate that had a slight pan whilst tracking which means instead of simply moving parallel to the focus of the shots we could move in more of a ‘U’ shape. These shots came out very nicely on the canon, we were pleased with these shots as they came out looking like authentic shots that would be useable in a professional production. 
2)The chest mount was a very easy way of taking shots on the move without having to balance the glide cam, these shots were very useful as on an HD camera any shaking of the camera makes it look unprofessional especially when in slow motion. we were very proud of these shots as we could take the same shot from numerous angles quickly without having to fiddle with the weight distribution of the glide cam, meaning we could exhibit pans along with a ghosting walking technique which again, added extra smoothness to the shots.  
3)changing the frame rate to 60fps at a slightly lower resolution picks up better on slow motion was very useful as it meant it would look more crisp in slow motion. This was very useful because as we were using an HD we were able to lose a small bit of resolution per frame, in order to have more frames taken. This was especially important for where the camera or the character where moving excessively, for example in the following shots, as both subjects were moving the extra frames, made the movement smoother. 

The challenges we had to overcome included pedestrians, as during our research into conventions, unless the public where a part of the shots they would not be included. For example, in ’The Noose of Jah City’ by king krule, the environment they are in is in a public place however pedestrians are not seen, which we attempted to do in order to conform to the conventions of our genre and the form that our video was in. This did mean however, that we had to retake a number of shots, but our research into logistics during the reccie meant that we knew that the area wouldn’t be busy during the morning on a week day. We also struggled with how to use the new equipment, as it was our first time using a track slider and glide cam. We overcame this by trying out each piece of equipment doing a range of shots before we went out to film throughout notting hill. We did find from using these pieces that the glide cam was difficult to use when needing to film more than the one off shot as the weights needed to be balanced properly.                                    Another challenge that we faced was as we were using 35mm photos in our printwork, we had to scan them into the computer before editing, which we were apprehensive about as sometimes they scan grainy if the printing of the photos isn’t perfect. We did have to rescan the photos to put them into our photoshop file before editing.    

We did the editing for our music video on DaVinci Resolve         where we experimented with a number of new techniques. One of these techniques was time manipulation, we set our clips to 50% speed and then from there, depending on whether we felt they should be longer or shorter we adapted it from there.  The speed of each individual clip was important in the overall construction to make it fit the forms of a music video, with cutting to the beat. This is a common convention of a music video for the visuals to have a relationship with the sound.                                                                                    Another technique we used was to colour grade certain parts of our footage so they still had smooth transitions between each shot, we did this by darkening certain shots and increasing the contrast so that the yellow of the main characters jumper was always given prevalence, we attempted to do this very subtly so the main character was highlighted in each shot. We did this by colour selection. Selecting yellows in the shot but reducing the effect so it didn’t dull out the other colours too.                 
Using the scissor tool only we managed to created a smooth piece where narrative fuzz was apparent. using the scissor tool in a more complicated way to follow a montage style, with numerous lines of action was difficult as if it was too random in ordering it wouldn’t make sense, and also we had to position certain shots in line with certain words of the visuals.                                                    

We took an unconventional approach to our print work, using an Olympus OM-20 which takes 35mm film in order to create a shot that would not only have a vintage feel which follows the metanarrative of our chosen artist, Mac DeMarco, and the aesthetics on 35mm we feel would be perfect for the form that our print work was planned to follow . This technique does have disadvantages however, as we could not view the photos we had taken until we had developed them. So we took numerous pictures in order to have a range to choose from using different angles and frames. We chose to use the same location for our paintwork so there was a strong correlation between the two. In photoshop during the editing process of our pieces, we used the colour balance in order to highlight the yellow of the sweatshirt that our ‘artist’ is consistently wearing throughout. Selecting the yellow using the colour picker and applying that in colour balance highlighted the yellows. Without lessening the effect of the other colours. Typography was also very important across our pieces. As we could have a relationship between the two. Choosing a font proved difficult. However once choosing one, we had to use the colour range tool to remove this font from the poster that it was originally on. And then change the colour of it by selecting it and reducing the opacity. Before again changing the colour balance to the same as the one we had selected before and then duplicating this layer until it was opaque.                             

Also the positioning of the pictures and the text was very important to the overall look of the pieces. For example, on the advertisement, using layering and the moving tool to position the text, following the rule of thirds and other conventions of printwork we had found from research into existing printwork, such as hierarchy of text with the most important text in largest and the least, smallest, all using the scale tool. 

Friday 13 January 2017

Finn Page - Final Production and Evaluation

Digipak


Magazine advert


Music video


Evaluation

Question 1 -


Question 2 - 


Question 3 - 


Question 4 - 

Click here to view question 4


Research


Logistics/Planning


Post-Production


Finn evaluation Question 4

How did you use media technologies in the construction and research, planning and evaluation stages?


Media technologies were a vital component in all areas of the production of our video and print work.


 In terms of planning, we used Blogger throughout the year to collate and share ideas, as well as using it as a platform to show all of our research tasks, concept development and logistical planning for shoots etc. The blog was also used to upload various rough cuts of the music video, to show its progression, and its development in accordance with feedback. The blog also provided a place for us to keep track of the independent progress we made each week, by completing multiple lesson logs a week. The benefit of this is to show that, while collectively we were working well and making an equal effort to complete the task, there were also things we were doing independently to help the project along. The use of a blog made the process simple and efficient. Aside from having used a blog in the same way for AS, we found that it makes things altogether clearer, as it creates one place to house all of our work – group and individual – where it is accessible by both group members and teachers, and can be edited and improved at any time. It also allows for more direct and efficient feedback from teachers.


        The purpose of our audience research task was to gauge the clarity of our video and how appropriate the stylistic choices we had made at that point were. We chose to use Google Forms, as it helped to keep all of our work linked together. Due to the fact that we were using blogger (a program accessible through google) along with Google slides as a medium to present slideshows and pictures, we were able to combine many different forms of media on our blog: Charts, tables, presentations etc. Using another google program for our audience research meant that our results were more easily integrated with our blog. As we had expected, the majority of answers gained from the audience research task were not entirely what we would have considered to be ideal answers. However, this was not an issue as we knew that our chosen genre had few conventions in terms of music videos, and therefore the audience had very little to base their feedback on. Nevertheless, we view this as a vital component of the production process as it gave us an idea of how our video would be received, and if there was anything we needed to change in order to make it so that the audience would view the video in the way we had intended.


      The program DaVinci Resolve 12.0 played an instrumental role in our production task. Having been newly introduced to this program for A-Level, we initially thought that it would be difficult to get used to using a different software, in order to produce what we would have hoped to be a very professional piece of work. However, we soon found that due to our existing knowledge and experience with other editing software such as Adobe Premier and Sony Vegas, we were more than capable of using Resolve, and that in fact it was a great deal more comprehensive and user-friendly. We first had a chance to get to grips with Resolve when editing footage from the group trip to Brighton. From this we produced the ‘Brighton Short’ video, which significantly progressed our concept development as the finished product resembled a lot of our initial ideas for our actual music video. Once used to Davinci, we were able to use it to edit the animatic for our video. The tools on Davinci made it easy to simulate the camera movements we had aimed to use for the actual shots. 


 During the filming of our music video we used a canon digital HD camera, along with a range of high end lenses. This helped to enhance the quality of our footage, as well as allowing for a high frame rate, which was imperative for our concept as we had planned to slow down the speed of the majority of our footage. We think the slow-motion style adds to the seamlessness of our video, and the 60 frames per second rate that we were able to film at ensured the smoothness of the footage once slowed down. One of the lenses we used was a canon 24-70mm. This particular lens offered an extremely wide angle, which gave us a massive advantage when filming in suburban and city environments. The wide angle also provided a much more professional aesthetic, especially for tracking shots. The vivid colours that the canon camera was able to capture meant that none of the quality of our shots was lost. The best example of this is the range of ‘warm’ colours that can be seen during the tracking shots towards the end of the song.


         For the digipak and magazine advert, we chose to shoot the images on 35mm film as it added another dimension to the visuals of the campaign, while the vintage aesthetics of the images would match the retro sound of DeMarco’s music. However, shooting on film meant that firstly, we could not view the pictures we had taken on location instantly, as with digital. Therefore, as a precaution, I attempted to re-create the images as accurately as I could on the digital camera we were using for filming. This meant that if anything went wrong with the originals during processing, we would have digital backups. Another drawback of analogue is that the images are less compatible with editing etc. than digital photos. This only meant that we had to ensure the quality of the raw images, by focussing on lighting, content and composition whilst on location.HoH  H


Monday 5 December 2016

Group - Updated cut 05/12/2016


  • Since the previous version, clips from the entire video have been re-arranged in order to allow for a faster cutting rate to be employed during the chorus. This faster cutting rate has brought about a variety of cutting rate for our video and made it more exciting, as was advised by teachers. 
  • Clips have also been re-arranged so that we could have the supermarket section start after the chorus, instead of during the chorus. This helps to separate the chorus from the rest of the song visually, whereas before the Tesco section was fairly unnoticeable.
  • The outro (car driving away) has also been removed, as on reflection we decided that it seemed like an outtake and did not fit with the video.

Thursday 1 December 2016

FP - Editing log 30/11/2016

Frankie and I had a conversation with the teachers, during which it was decided that at present, the cutting rate of our video is fairly constant all the way through. It was agreed that in order to make it more exciting and a more accurate visual representation of the song, in places the cutting rate would need to be increased and varied. However, due to the fact that, having completed the timeline, a lot of the clips lined up with the song in a specific way, therefore we couldn't simply cut clips up and move them around without  planning and calculating the precise timings. This meant finding new unused footage from untouched clips and remaining parts of clips that we had previously trimmed. Today I chose to begin by increasing the cutting rate of the clips shown during the second chorus, as can be seen below.